Setup local CA for your lab
Published on Sunday, 31 December, 2023Table of content
- Intro
- Installation
- Configuration
- Creating Root CA
- Creating Intermediate CA
- Create server role
- Issue certificate
- Add certificate to vault
- Why is there a warning?
Intro
In modern times, not having https is not only dangerous, but inconvenient as well. Browsers will complain, some thing will just refuse to work without jumping through hoops.
So having a home lab or local setup almost dictates having a custom certificate. Which is a pain. You can create the whole thing in terminal with openssl, then you have to store it somewhere, keep track of it, renew it after a year (and probably figure it out again and deal with all the stuff that changed in last year). And the root certificate (or rather key) is one of the few things that are truly bad to have leaked, since someone with your root CA can forge almost anything.
To somewhat sort this, I'll show how to deploy HashiCorp Vault. It's not my favourite piece of software but it does help with keeping the whole Certificate Authority thing reasonable.
Installation
Like everything else, I'll deploy vault into podman container. It's not recommended, supported or advised setup by HashiCorp, but we don't care. I have an older Rocky Linux server, so installing podman is as simple as running:
# dnf install podman
But at this point it should be equally simple on any distro.
Once you have podman, create the folder structure for persistent files used by vault. I'm putting all my containers in /containers folder.
# mkdir -p /containers/vault/logs
# mkdir -p /containers/vault/file
# mkdir -p /containers/vault/config
Next thing we need is a config file, create a very basic one at /containers/vault/config/configl.hcl:
storage "file" {
  path = "/vault/file"
}

listener "tcp" {
  address     = "0.0.0.0:8200"
  tls_disable = "true"
}

api_addr = "https://0.0.0.0:8200"
ui = true
Now a keen reader will notice that we have disabled the tls, very thing we are trying to fix. It's a catch-22 situation, we need a certificate to use vault to create the certificate. So we'll start without one and then add it later. If you are paranoid enough to think this is a big risk, you should know better than to read this guide.
Once you have all the folders and files there, you should be able to start vault with following command:
# podman run --rm -d --name vault --volume /containers/vault/logs:/vault/logs:Z --volume /containers/vault/file:/vault/file:Z --volume /containers/vault/config:/vault/config:Z --cap-add IPC_LOCK -p 8200:8200 docker.io/hashicorp/vault vault server -config=/vault/config"
This will create the container with all the folders mounted in right places, and listening on port 8200. Notice that i'm starting this pod as root.
Configuration
Now that you have the pod running, there is a few thing that we want to configure. First of, if you want to run this for any amount of time, you'll want it to autostart on boot. For that, let's create a systemd file:
# podman generate systemd --new --files --name vault
Put it in the right place and enable service:
# mv container-vault.service /etc/systemd/system/
# systemctl daemon-reload
# systemctl enable container-vault.service
Once this is done, let's login into vault. Point your browser to https://serveraddress:8200 and you should see the vault init page.
Here is the first concept that you might not have encountered before. Vault database is sealed each time you stop the server, and to get the data you have to unseal the vault each time you start it. There are multiple ways to do that automagically, but we won't bother with them, if you are interested you can read the docs.
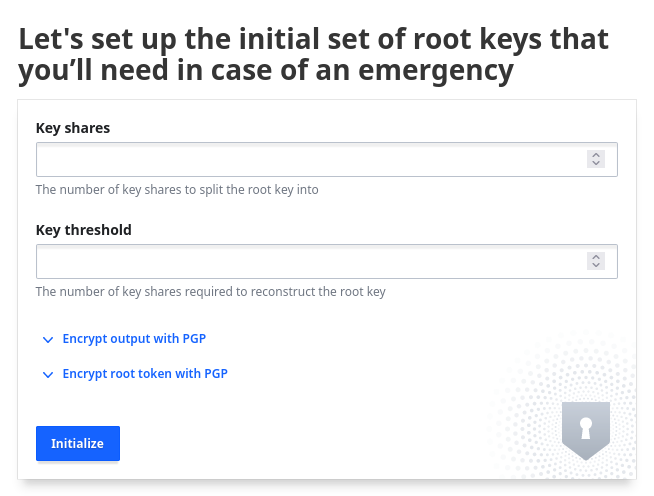
The unseal uses multiple keys to unseal the data. You can specify the total number of keys and the number of keys you need to unseal. So if you have, say, 3 keys, lets call them A, B and C, and you choose to require 2 keys to unseal, you can use any combination of two keys: AB, BC or AC.
So let's generate multiple unseal keys and store them in a single place, we are just pretending to do security here, not actually doing it. Type your desired numbers and Initialize.
You will be presented with all your keys and a root token. This is your only chance to save them, so do that now. Once you click Continue they are gone forever and you'll have to recreate vault if you loose them. So let's continue.
Provide the unseal key in next form, and then you'll be greeted with login screen.
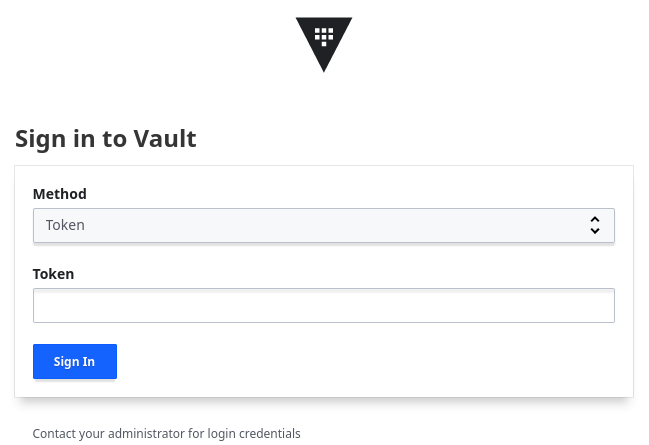
Until you restart the server, you won't need to enter the unseal keys any more. Login with your root token.
Creating root CA
Now vault can do a lot, and this is really only one of many things, read the docs if you are interested in more.
Enable PKI engine
First thing we need to do is enable PKI Secrets Engine, so:
- choose
Secrets Engines -> Enable new engine - select
PKI Certificates - enable
PKIby clickingEnable Engine
Configure engine
This will be our root CA. Select Configure PKI and choose Generate root.
I use exported as type, which will present you the key once generated, so that you can save it somewhere safe. The only reason I do this is because i want to be able to switch to different solution without recreating all the certificates and keys.
For common name put something that will identify it as root CA, for instance root-ca. For issuer you can put your name (or name of the company). Next is TTL and default is in seconds, so don't create a certificate valid for a few minutes (guess how I learned that). Three to five years (1095 to 1825 days) is probably a good number, but you can go with anything really.
Put your domain under Permited DNS domains. You can leave this blank, but in that case if someone get's hold of your root key they can pretend to be anyone, so don't do that unless you are doing something specific where you want to forge the certificates.
Feel free to look at other options and tweak the certificate, or just click on Done.
Depending on your choices before, you will be presented with your new certificate and key. If you choose exported as type, save the key, again, this is the only time it'll be presented.
Click Done once you are finished.
Creating Intermediate CA
While you can sign all your certificates with root CA, good practice is to have an intermediate CA to sign the keys. That way in case your intermediate CA becomes invalid, you can still keep your root. Also, you could have a single root with multiple intermediate CAs for, say, different domains.
Enable PKI engine
Just like for root CA, we'll enable the PKI Secrets Engine again:
- choose
Secrets Engines -> Enable new engine - select
PKI Certificates - change name to
pki-int - enable
PKIby clickingEnable Engine
Configure engine
This will be our intermediat CA. Select Configure PKI and choose Generate intermediate CSR.
CSR stands for Certificate signing request, once generated, you can sign it by root CA and therefore creating a chain of trust.
Procedure is same as for root CA, change name to something like intermediate-ca, choose you type and click generate.
Sign intermediate CSR
Go back to your root CA (secrets -> pki), select Issuers and your only issuer in the list. Select Sign Intermediate in top menu. Paste you CSR into the appropriate field. Set Common name and TTL, which has to be shorter than the root CA TTL. And, again, add Permitted DNS domains if you want.
Once you fill all the fields, click Save.
Store your certificates somewhere safe.
Import certificate
Go back to your intermediate CA (secrets -> pki-int) and select Configue PKI again. This time let's Import a CA.
Enter the signed intermediate certificate and key (from previous step) and press Import issuer.
You should now have one Issuer in pki-int.
Create server role
We are almost there. Next thing we need to do is create a role. A role is a "model" for a certificate, so you would have server role and user role. Different roles have different key options.
Set the name as server. The TTL should be something reasonably short, but not completely impractical, say 1 year.
Select Basic constraints valid for non-CA, since we aren't creating CA any more.
You can change a lot of options here, but let's do bare minimum.
Under Domain handling you can choose if you want to allow wildcards certs, subdomains etc. You should also set the Allowed domains to something that your root CA and intermediate CA allow.
Under Key parameters you can change the key length.
You can check the rest for yourself.
Select Create when done.
Issue certificate
We are finally ready to create an actual certificate. Lets create one for vault for start.
Select server under Issue certificate in pki-int, and click Issue.
Set common name to your vault url, something like vault.mylib.tld, and under Subject Alternative Name (SAN) Options, put your vault URL under Subject Alternative Names (SANs) as well. You could also put an IP address in appropriate fields, but sticking with DNS names is probably a better idea (you do have a dns server, right?).
Click Generate and that's it, your new certificate is ready. As always, save the sensitive information, because it's only time it'll be presented to you.
Add certificate to vault
Now it's time to remedy the issue we actually started with, putting stuff behind tls.
Create files
Create new folder inside your container files:
# mkdir /containers/vault/config/certs
You have to create two files inside. First one is just the key. Create a file with key.pem as name and paste the private key of your vault certificate inside (last one issued). Next one is a certificate chain for vault. Create a new file with full-chain.pem as name and paste following certificate inside:
- your vault certificate (last one issued)
- your intermediate CA certificate
- your root CA certificate
Update config
Update the config.hcl to contain:
storage "file" {
  path    = "/vault/file"
}

listener "tcp" {
  address     = "0.0.0.0:8200"
  tls_cert_file = "/vault/config/certs/full-chain.pem"
  tls_key_file  = "/vault/config/certs/key.pem"
  proxy_protocol_behavior = "use_always"
}

api_addr = "https://0.0.0.0:8200"
ui = true
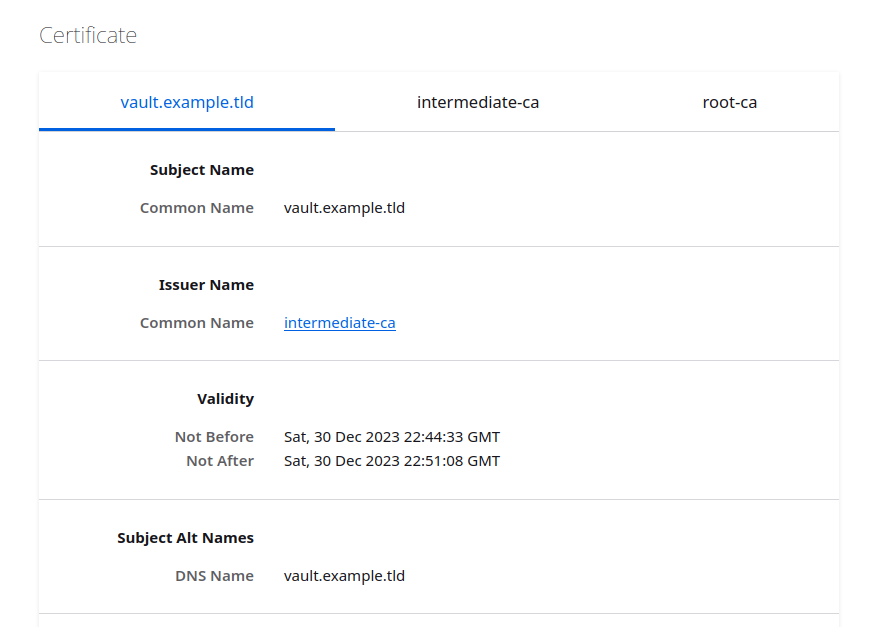
And restart the vault server. You should now be able (or rather forced) to connect to your vault with https. And if you inspect your certificate, you should see something similar to this:
Why is there a warning?
So you did all that work, yet when you open the page in browser you are greeted with something similar to:
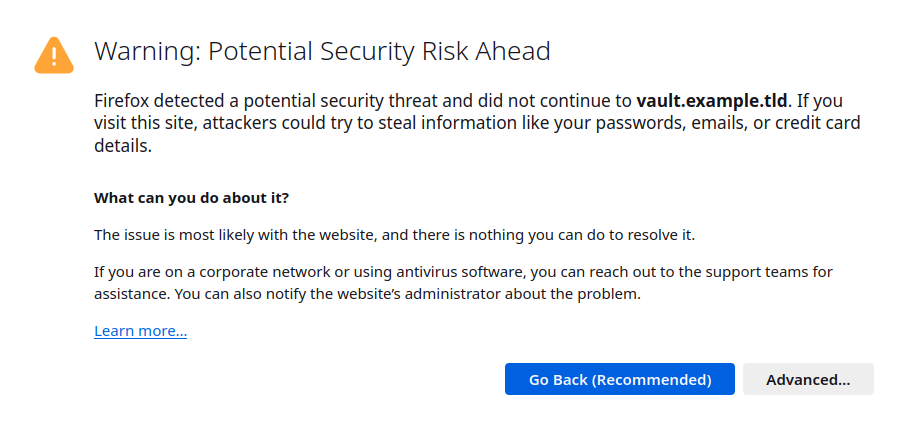
Why is that?
The reason is that all systems come with a collection of trusted certificates. Yours isn't there. So if you want to avoid the warning you have to add the certificate to your certificate store. This is beyond this guide and depends on what you use the certificate for. Just to give you some ideas, you can add the certificate to certificate store of your operating system, browser, or some custom application.